Building A Basic Python Ray Tracer With Pygame
Introduction
In this blog post, I will be detailing the process of creating a simple ray tracing library using pygame. I first undertook the project in my middle school advanced coding class due to an interest in 3D rendering that emerged during quarantine. The project served as an easy project to improve my python skills that could still generate beautiful images. Despite its simplicity, the project still took me a long time to research and understand the ray tracing technique before everything finally “clicked”.Showcase & Code Link
The code can be accessed here.Background
If you clicked on this post, you probably have a good idea of what ray tracing is. In the interest of completeness, however, I will provide a basic description here. Ray tracing is a form of 3D rendering that achieves realistic graphics by simulating the path of light as it interacts with objects in a virtual scene. Unlike traditional rasterization, which focuses on projecting the scene geometry to pixels directly, ray tracing traces the path of light rays from the viewer’s perspective, emulating the behavior of light in the real world. By simulating the interactions of light with various objects and surfaces, ray tracing produces highly accurate and visually impressive results with accurate reflections, shadows, and other elements that are difficult and expensive to achieve accurately with traditional rasterization. However, it is far slower than the extremely fast rasterization rendering technique (the dominant technique in realtime graphics). Recently, modern hardware has made it possible to perform ray tracing in real time. Animated movies have been using ray tracing for a while, and Pixar’s 2013 movie, Monsters University, was the first animated movie to use ray tracing technology for all lighting and shading.The basic principles:
Ray Generation: The process begins by generating rays from the viewer’s eye through each pixel on the screen. These rays act as virtual camera rays and serve as the starting point for the ray tracing algorithm.
Ray Intersection: Once the rays are generated, they are traced through the virtual scene. As the rays propagate, they intersect with objects within the scene, such as geometry or surfaces. These intersections are computed by solving mathematical equations or algorithms, determining the point at which the ray interacts with an object.
Reflection and Refraction: When a ray intersects with a surface, it can either bounce off (reflection) or pass through (refraction) the object, based on the material properties defined for the surface. This behavior allows for the simulation of realistic effects like shiny reflections or transparent objects.
Lighting: As rays bounce or pass through objects, they interact with light sources and other objects in the scene. This interaction determines the intensity and color of the rays, taking into account factors such as the material’s properties, the angle of incidence, and the presence of shadows.
Shadow Calculation: Shadows are an essential aspect of rendering realistic scenes. Ray tracing calculates shadows by determining if a ray from a surface point to a light source is blocked by any other object in the scene. If an obstruction is detected, the point is in shadow and receives less light.
Here is a diagram that demonstrates ray tracing:
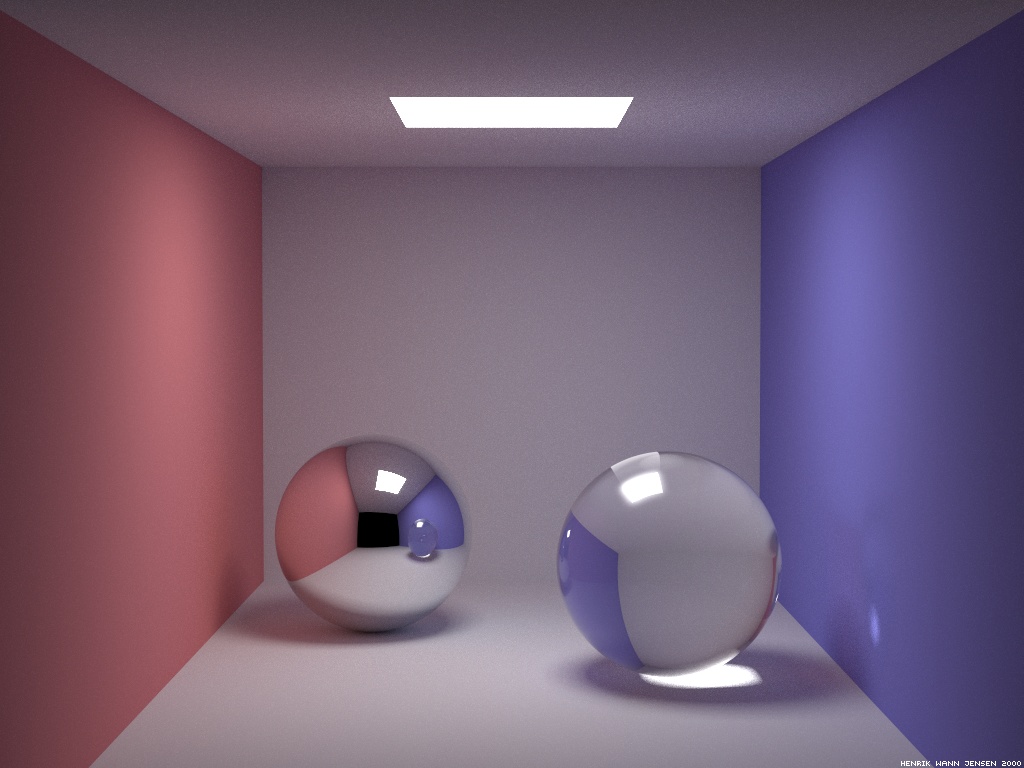
And here is the Cornell Box, a popular scene that showcases what ray tracing can do by implementing light sources, shadows, global illumination, reflections, ect:
Of course, this is only a surface level explanation covering the basics. Ray tracing can also be extended with more advanced techniques like global illumination and path tracing. For a more complete description, I recommend checking out the book Ray Tracing in One Weekend by Peter Shirley (which I’m currently using to build a more advanced path tracer in C++).
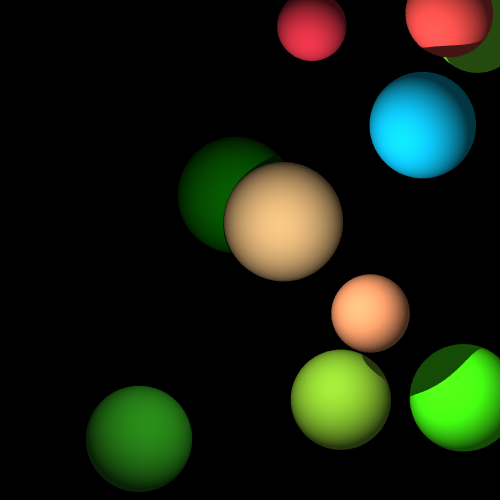
Some picture results of the python ray tracer we will create (in addition to the picture in the thumbnail) can be seen here:
Vector Class
The code of the vector class is as follows:
from math import sqrt

class Vector3:  # Vector3 Class
    def __init__(self, x, y, z):
        self.x = x
        self.y = y
        self.z = z

    def __add__(self, other_Vector3):  # Adding vector with another vector
        return Vector3(self.x + other_Vector3.x, self.y + other_Vector3.y, self.z + other_Vector3.z)

    def __sub__(self, other_Vector3):  # Subtracting vector with another vector
        return Vector3(self.x - other_Vector3.x, self.y - other_Vector3.y, self.z - other_Vector3.z)

    def __mul__(self, n):  # Multiplying vector with a number
        return Vector3(self.x * n, self.y * n, self.z * n)

    def __rmul__(self, n):  # Multiplying vector with a number (on the other side)
        return Vector3(self.x * n, self.y * n, self.z * n)

    def __truediv__(self, n):  # Dividing vector with a number
        return Vector3(self.x / n, self.y / n, self.z / n)

    def __str__(self):  # Representation method
        return "({}, {}, {})".format(self.x, self.y, self.z)

    def dot_product(self, other_Vector3):  # dot product
        return self.x * other_Vector3.x + self.y * other_Vector3.y + self.z * other_Vector3.z

    def normalize(self):  # Normalize vector
        magnitude = sqrt(self.x * self.x + self.y * self.y + self.z * self.z)
        return Vector3(self.x / magnitude, self.y / magnitude, self.z / magnitude)

    def negative(self):  # Multiply x, y, and z by -1
        return Vector3(self.x * -1, self.y * -1, self.z * -1)

    def to_color(self):  # Formatting to an rgb color
        r = int(self.x)
        b = int(self.y)
        g = int(self.z)

        if (r > 255): r = 255
        if (r < 0): r = 0
        if (b > 255): b = 255
        if (b < 0): b = 0
        if (g > 255): g = 255
        if (g < 0): g = 0

        return Vector3(r, b, g)

    def to_tuple(self):  # Converting to a tuple
        return (self.x, self.y, self.z)